


Dashboard
Once you’ve installed the app, everything you need sits in one place: the app dashboard inside your Shopify admin. This guide walks you through each section of the sidebar, so whether you’re building your first form or troubleshooting a failed API call, you’ll know exactly where to look.
Dashboard Home
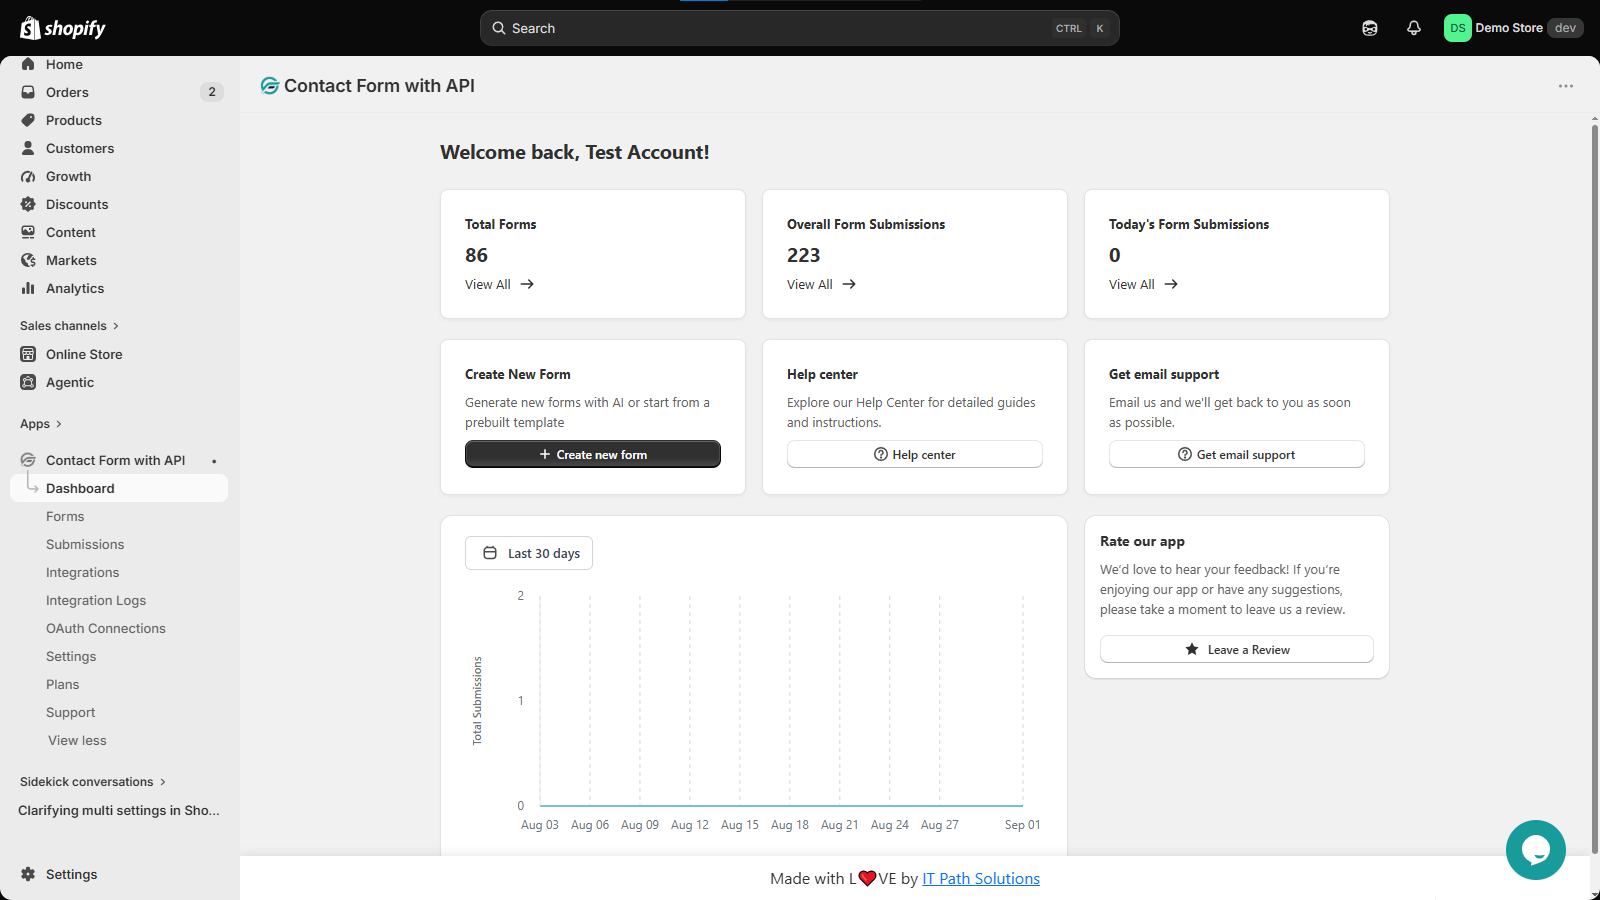
This is the screen that greets you every time you open the app, and it’s built to give you a quick read on how things are going without making you dig.
- Total Forms, Overall Form Submissions, and Today’s Form Submissions sit right at the top. Each counter has a “View All” link, so if a number catches your eye, you can jump straight into the details.
- Create New Form lets you start fresh, either by generating a form with AI or picking a template, right from the home screen.
- Help Center takes you to detailed guides if you’d rather find an answer yourself.
- Get Email Support is your direct line to the support team when the help center doesn’t cut it.
- Rate Our App is there if the app has been working well for you and you want to say so.
- The submissions chart shows your activity over the last 30 days, so you can spot a spike or a slow patch at a glance instead of counting rows in a table.
Forms
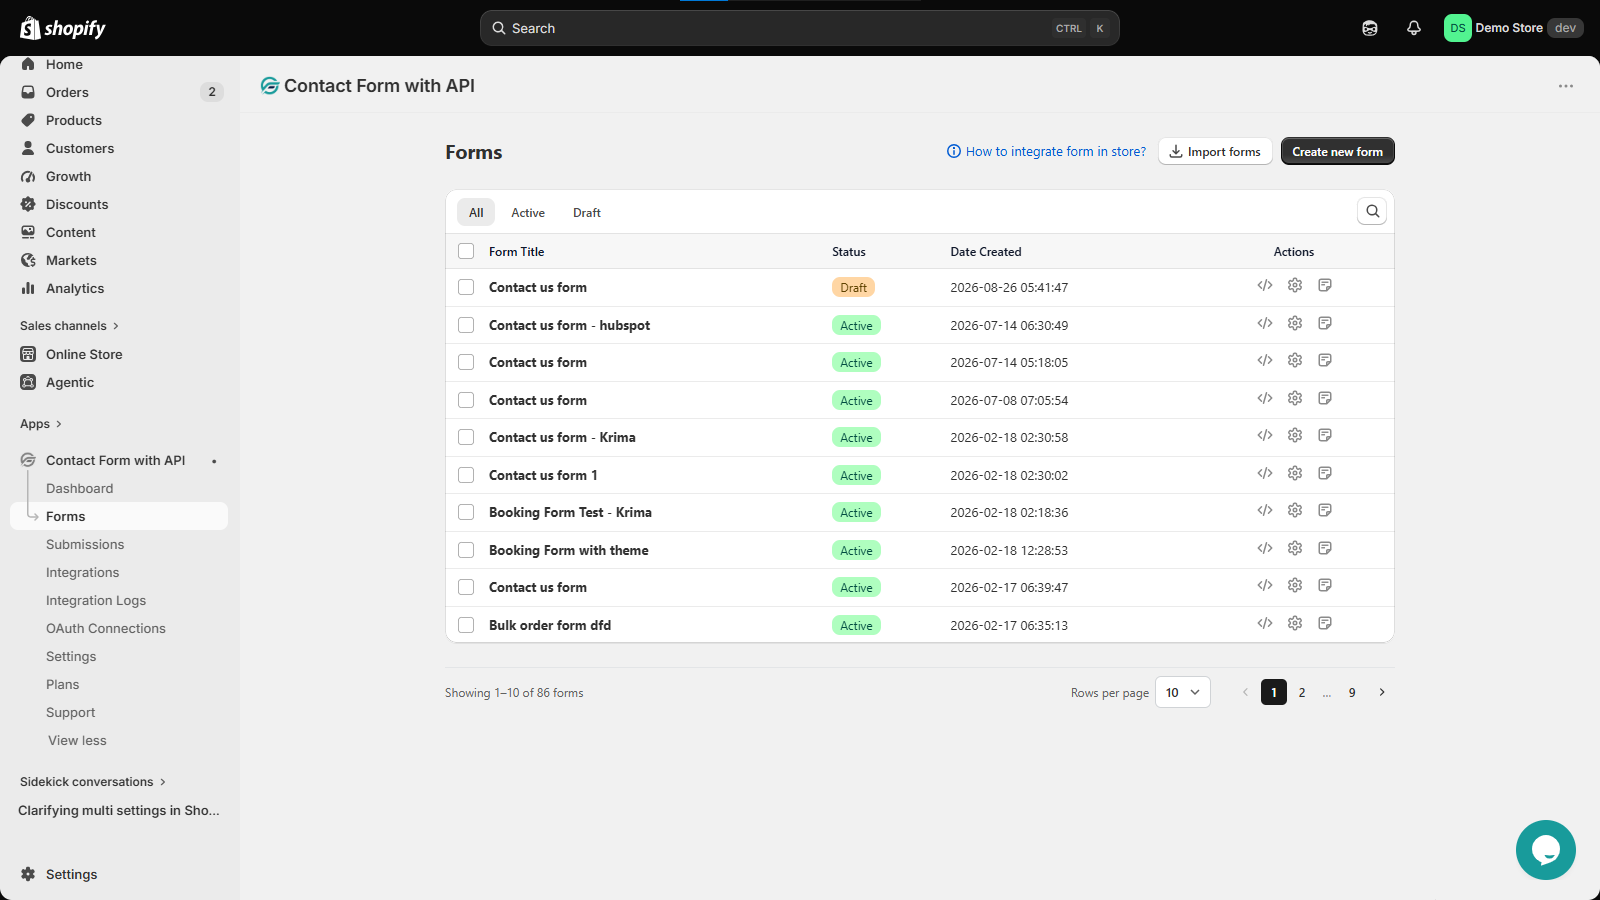
This is where your forms actually get built, and where you’ll spend most of your time managing them.
- The All / Active / Draft tabs let you filter your list by status, handy once you’ve got more than a handful of forms.
- Each row shows the form’s title, status, and the date it was created.
- The Actions column is where the real work happens: grab a form’s embed code, open its settings to tweak fields or design, or duplicate it if you need something similar without starting over.
- Import Forms brings existing forms in rather than making you rebuild them.
- Create New Form starts one from scratch or from a template.
- If you’re not sure how to get a finished form onto your storefront, the “How to integrate form in store?” link walks you through it.
- Once your form list grows, the pagination at the bottom keeps things manageable.
Submissions
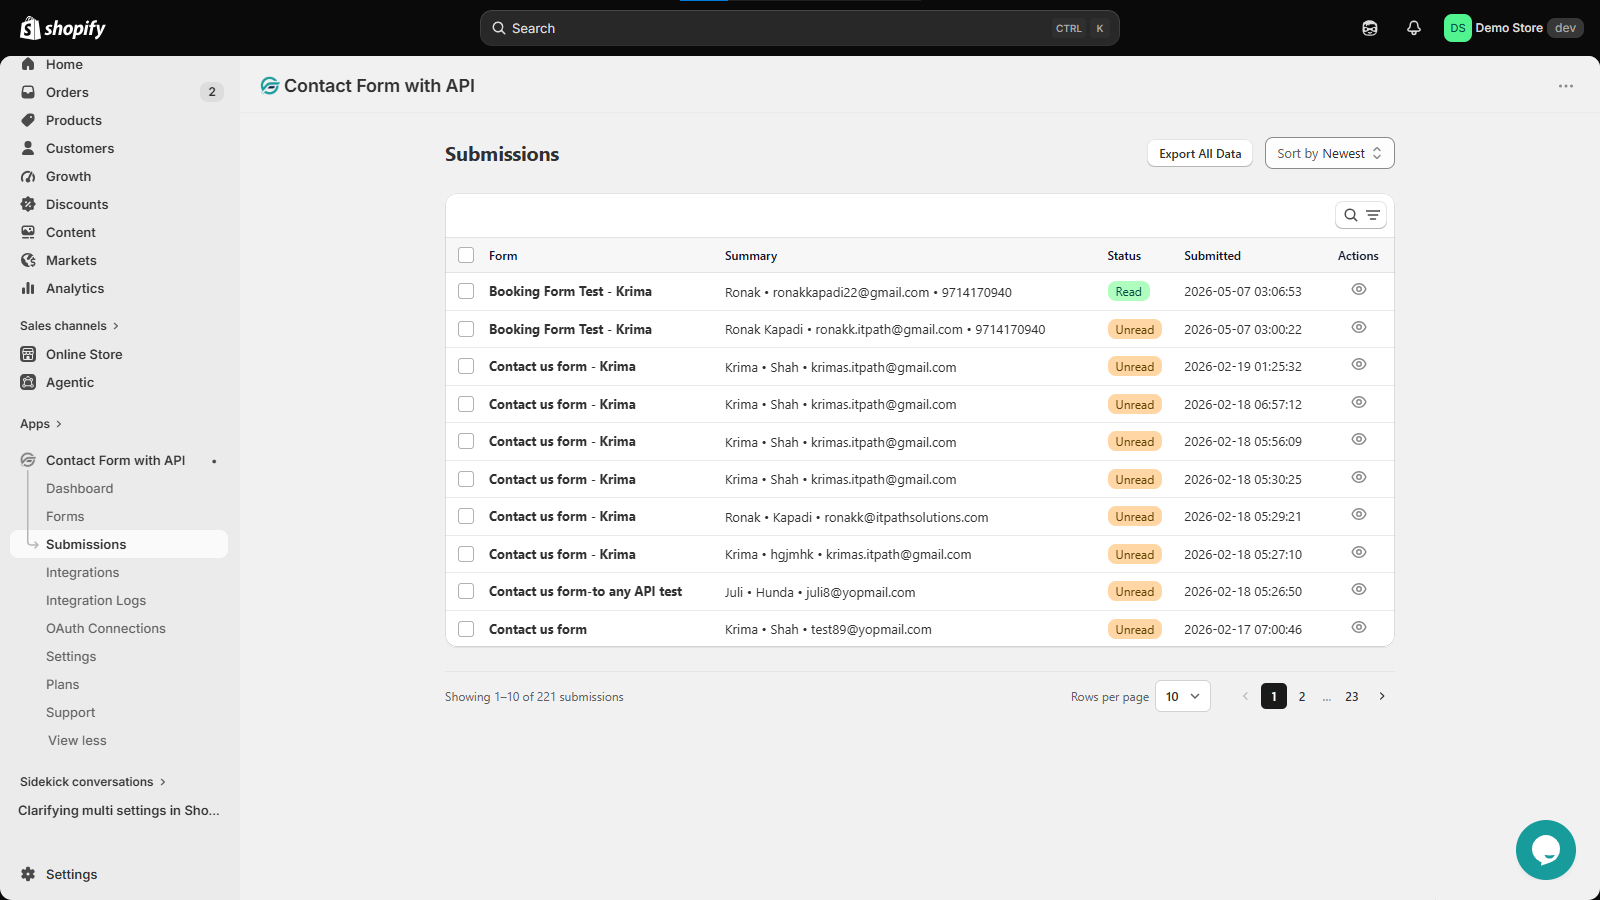
Every response your published forms collect ends up here.
- Each entry shows the form it came from, a quick summary of what was submitted (name, email, phone, whatever the form asked for), whether it’s been read or not, and when it came in.
- Click the view icon next to any entry to see the full submission.
- Not looking for the newest entries? Use Sort by Newest to flip the order, or the search and filter icons to zero in on a specific form, date, or status.
- Need the data somewhere else, like a spreadsheet? Export All Data pulls everything out in one go.
- Pagination at the bottom helps once submissions start piling up.
Integrations
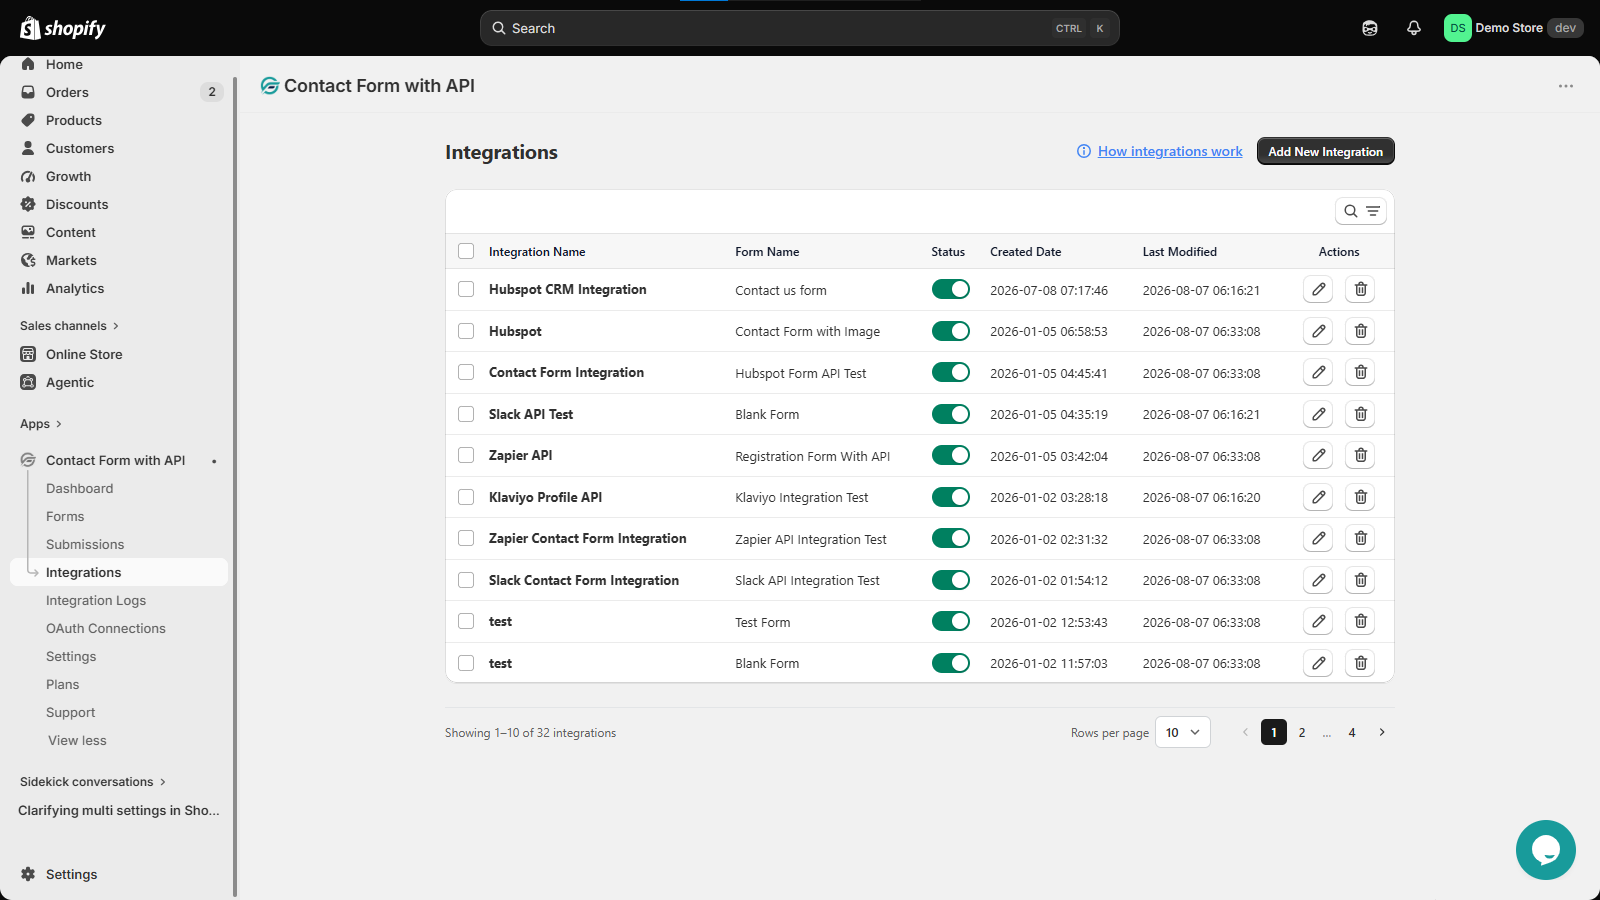
This is your connections hub, where forms link up with email and the other tools you use, CRMs, marketing platforms, automation tools, and more.
- Each integration shows its name, which form it’s tied to, its current status, and when it was created or last touched.
- The status toggle is worth knowing about: it lets you switch an integration off temporarily without deleting your setup, useful if you need to pause something without losing the configuration.
- From the Actions column, you can edit an integration’s settings or remove it for good.
- Add New Integration starts the process of connecting a form to something new, whether that’s HubSpot or Zoho for your CRM, Slack for notifications, Zapier for automation, or Klaviyo for email marketing.
- Not sure how integrations fit together? The “How integrations work?” link breaks it down.
- Pagination kicks in here too once you’ve got a longer list.
Integration Logs
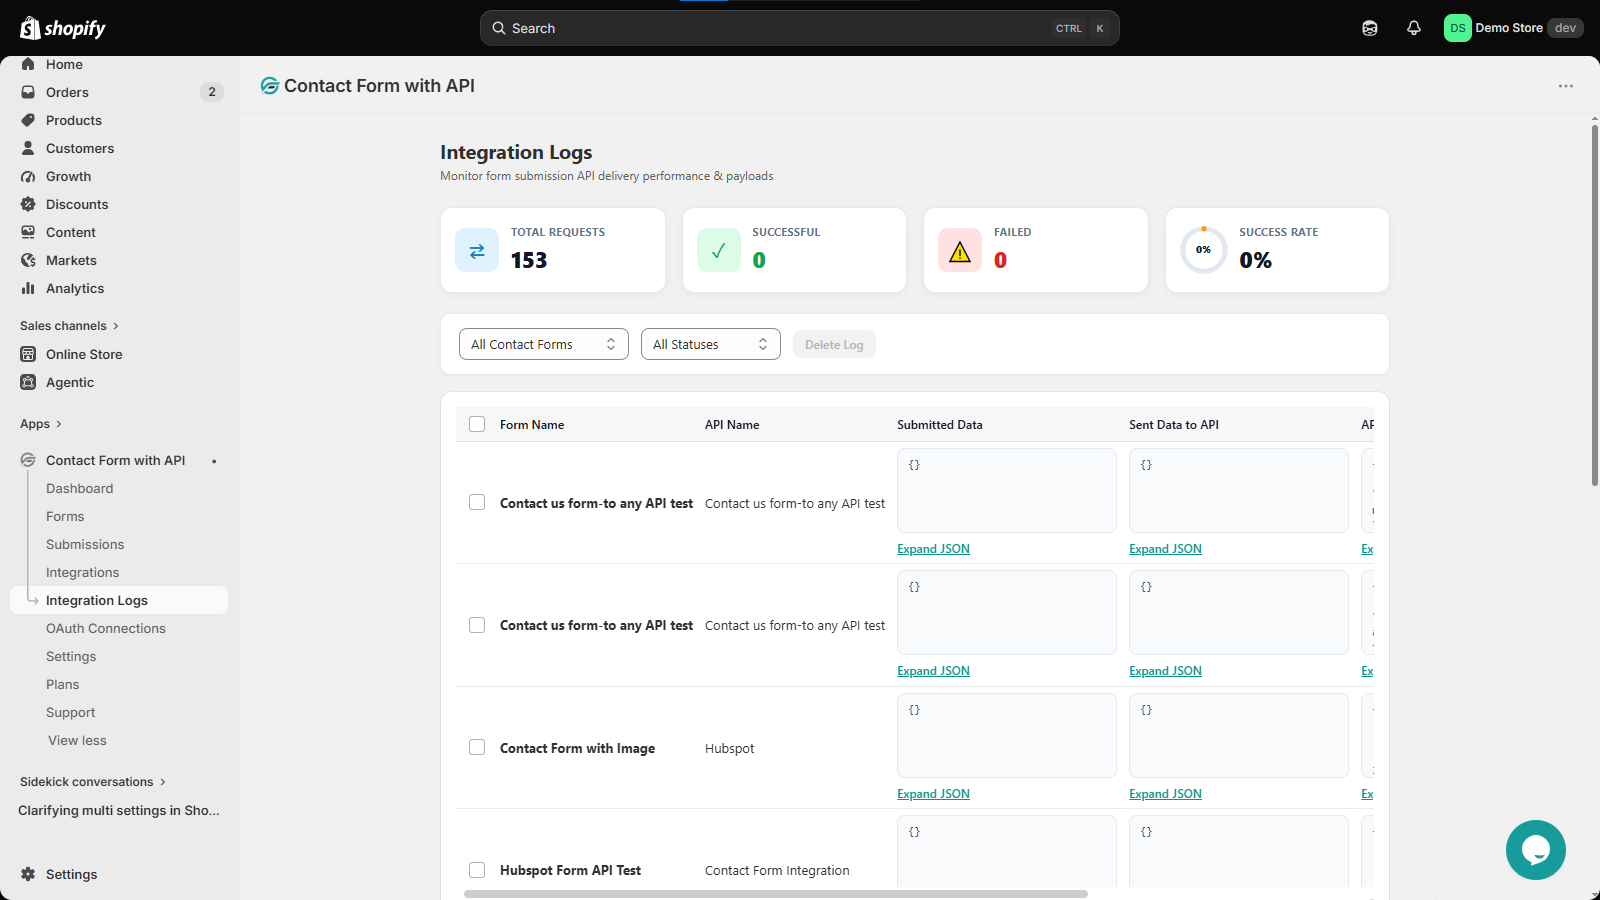
When an integration misbehaves, this is where you go to find out why.
- The summary tiles at the top give you a quick health check: Total Requests, Successful, Failed, and your overall Success Rate, before you even open a single log.
- Narrow things down with the form and status filters above the table.
- Each log shows the form, the API it was sent to, what was originally submitted, what was actually sent, and what came back. Click Expand JSON on any of these to see the full raw payload, which is usually where the real answer is hiding.
- Delete Log clears out entries you don’t need anymore.
OAuth 2.0 Connections
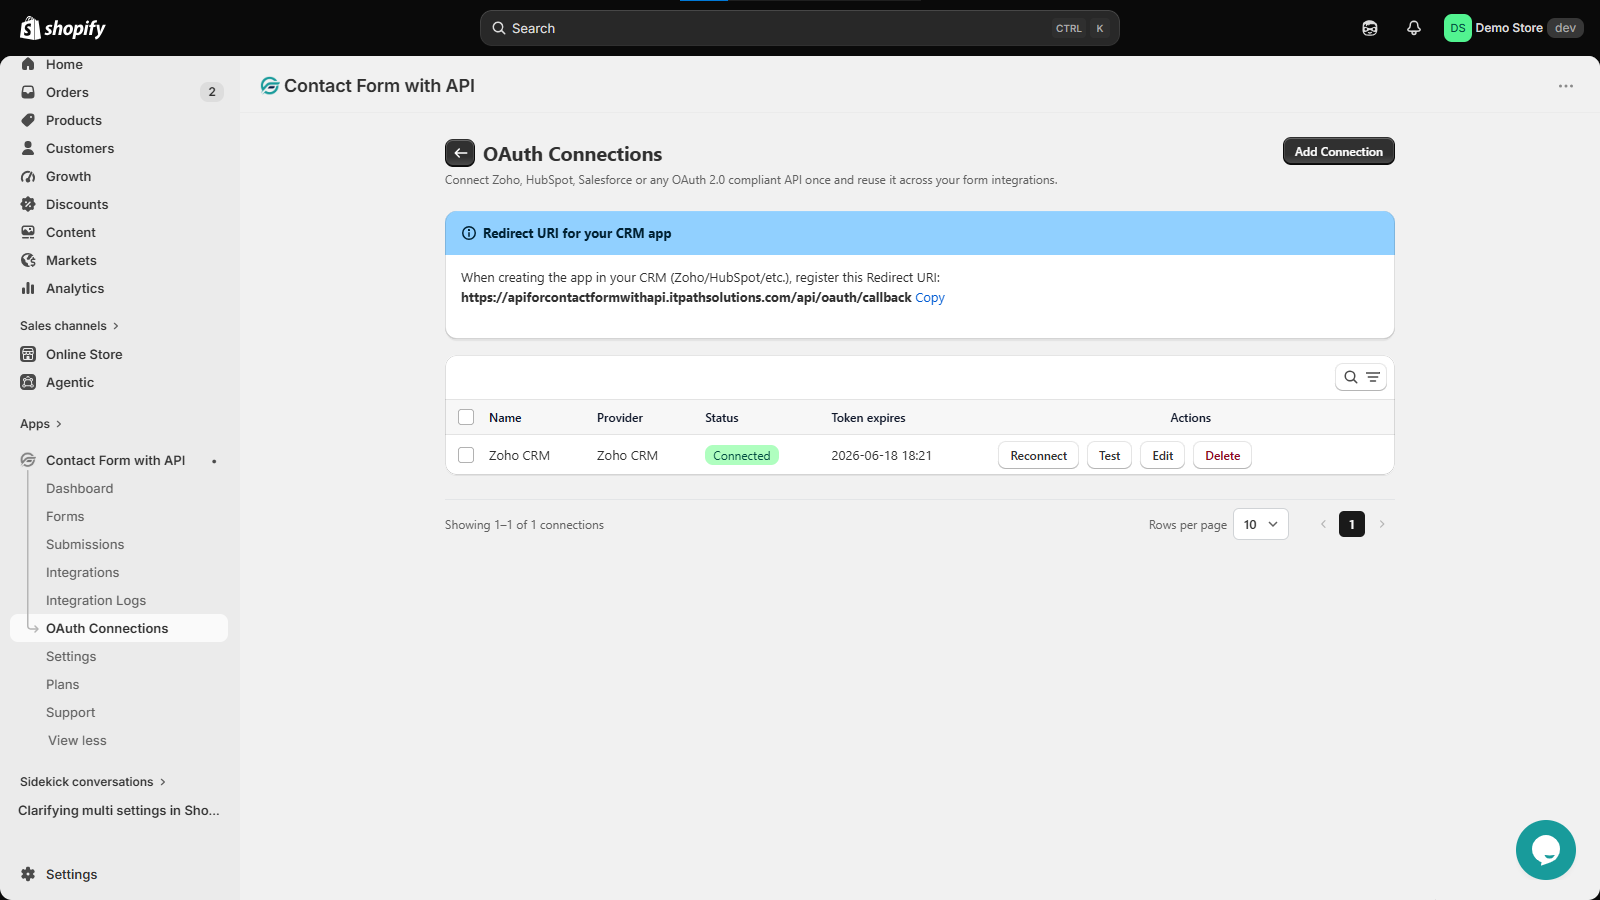
Rather than authenticating a CRM separately for every single form, this is where you connect it once and reuse it across as many integrations as you like.
- The app works with Zoho, HubSpot, Salesforce, and really any OAuth 2.0 compliant API.
- Before you connect anything, copy the Redirect URI shown on this page and register it in your CRM’s app settings first. Skip this step and the connection won’t go through.
- Each connection lists its name, provider, status, and when its token expires.
- From here you can Reconnect if a token has lapsed, Test to make sure everything’s still talking, Edit to update the setup, or Delete to remove it.
- Add Connection starts a new one.
Settings
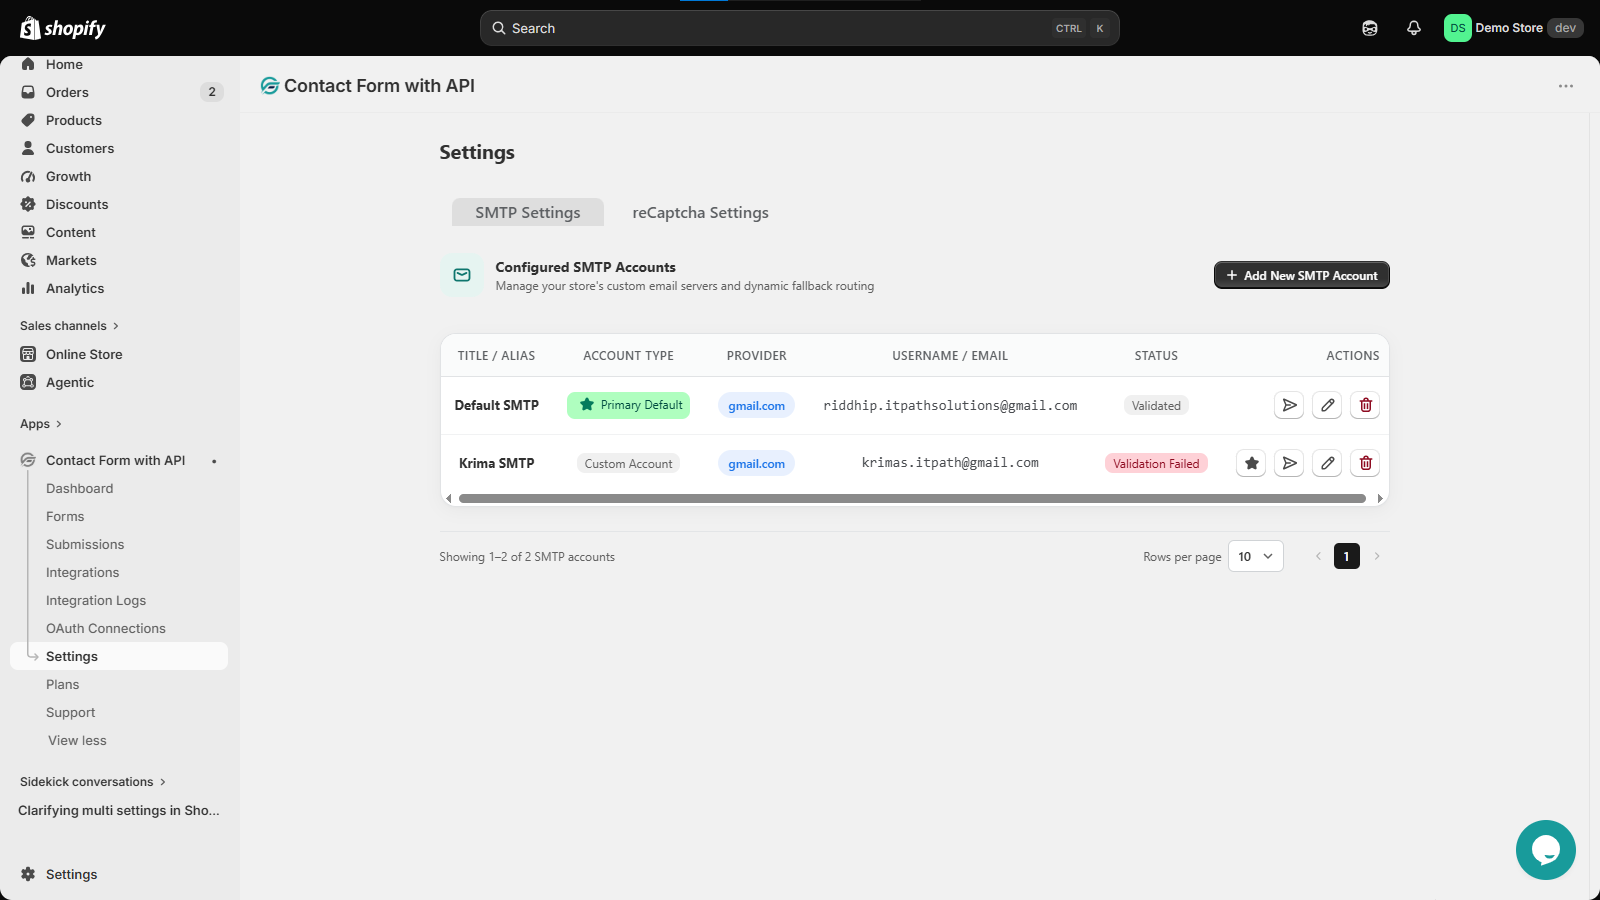
Your account-level configuration lives here, split across two tabs.
- SMTP Settings
- See every SMTP account you’ve configured, along with its title, account type (primary default or custom), provider, username, and validation status.
- One account is always your Primary Default, the one used automatically unless a form says otherwise.
- The Actions column lets you send a test email, edit credentials, promote a custom account to primary, or delete one you no longer need.
- Add New SMTP Account is there if different forms need to send from different addresses.
- reCAPTCHA Settings
- Set up your reCAPTCHA keys here to keep spam and bot submissions off your forms.
Plans
This is where you check your current plan, whether that’s Free or Pro Automation, along with your billing details. If you’re on Free and want automation features, this is also where you’ll find the upgrade path and a look at what each plan includes.
Support
Stuck on something the help center couldn’t solve? This is where you reach the support team directly for hands-on help.
Quick Reference
| Section | What it’s for |
|---|---|
| Dashboard Home | Account snapshot, quick actions, submissions trend |
| Forms | Build, edit, duplicate, enable/disable, and delete forms |
| Submissions | View, search, filter, and export collected entries |
| Integrations | Connect and manage email and third-party tool integrations |
| Integration Logs | Troubleshoot API delivery with request/response logs |
| OAuth 2.0 Connections | Authenticate once with a CRM and reuse across integrations |
| Settings | SMTP and reCAPTCHA configuration |
| Plans | Current plan, billing, and upgrade options |
| Support | Direct technical assistance |
That’s the full tour of our dashboard, bringing every feature of our app together. With IPS – Contact Form to Any API your forms, the data they collect, and the tools they connect to have their own home, which makes it a lot easier to find what you need without hunting around. If you ever land somewhere and aren’t sure what to do next, we are just one click away – [email protected]